It’s much easier to apply watermark, if you follow this watermark tutorial to add copyright to photos. Whether it’s about applying watermark to hundreds of pictures or simply putting a watermark on a photo, the best watermark creator gives you the best chance to finish the task within several clicks and minutes.
Please make sure you have downloaded Watermark Software and launched it before moving forward.
First thing first, load the photos needed to be processed. Two tunnels here, “ADD IMAGES” and “ADD FOLDER”, are both easy to access photos.

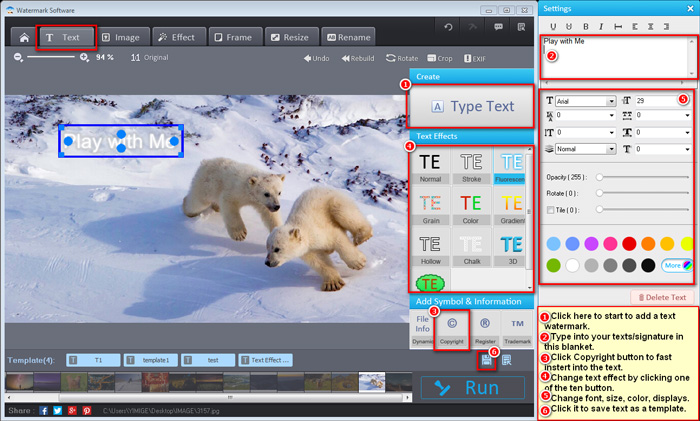
Click “Text” on the top and “Type Text”①. Type whatever text in the biggest “Setting” blanket②. Also you can fast add Symbol mark like “©” by clicking the buttons on ”Add Symbol & Information” table③. Then select text effect. Besides, you can save this text watermark as a template⑥ to use it next time.
To know more about text watermark and see more samples, please check: Add Text Watermark for Your Photo.
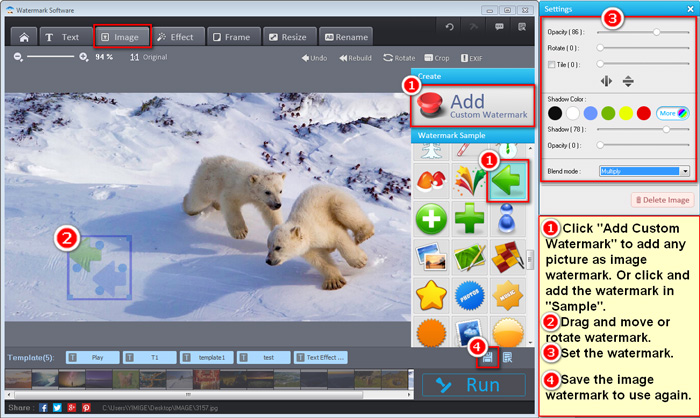
* Enter “Image” on the top. You will have two choices to insert image watermark: either from hard drive by clicking “Add Custom Watermark”①, or simply click sample image button① in “Watermark Sample”.
* Then drag and move the watermark to the position where you want it to be②.
* Change the watermark in the field of “Settings”③. Other than that using “Add Custom Watermark”① with a proper “Blend mode” in the “Settings”③, you will be able to add handwriting signature to pictures.
* Saving template, you can save image watermark solely with clicking of “Template Save”④.
To know more about image watermark and see more custom watermarks samples, please check: Add Image Watermark with The Best Photo Software.
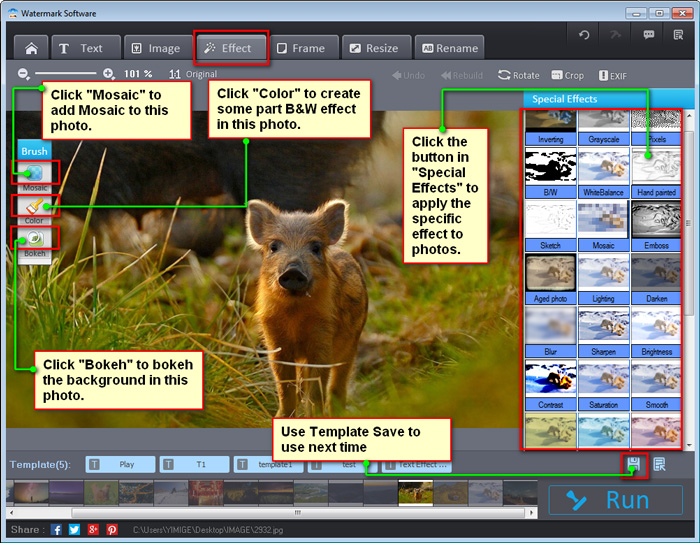
Pressing “Effect” on the top bar, you will see the “Effect” operation interface. Here, you are able to click “Mosaic” to apply it to the current photo, or hit “Color” to add black and white effect in the rest of background area on the photo, or use “Bokeh” on current photo. The “Special Effects” field on the right of interface is a section, which can be clicked and used to apply a specific effect to all loaded photos. Be alerted, this command in the right does not only apply the effect on current photo, but also apply it on other photos .
To get more details about effect adding, please check: Add Image Watermark with The Best Photo Software.
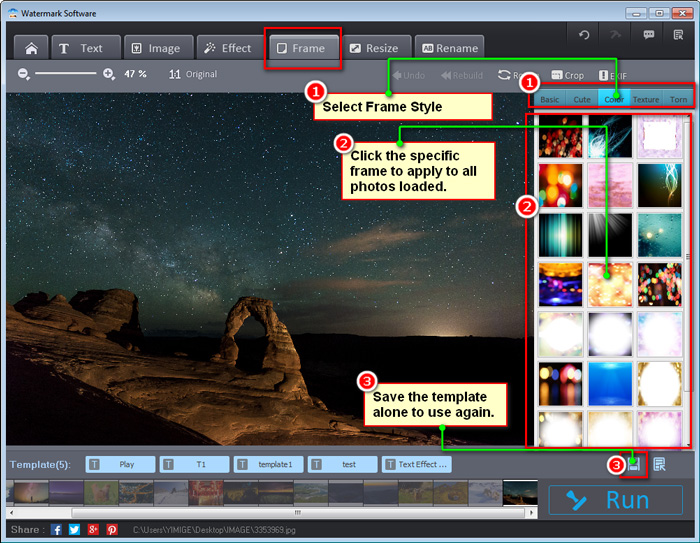
Select “Frame” on the bar upside. Then select Frame style① and click the frame you like on your photos②. Frame will be automatically added to all photos. You can see the effect immediately, and then decide whether to keep it or change it with another better frame.
Know more tips and samples in photo frame, please check: Add Frame to Photo.
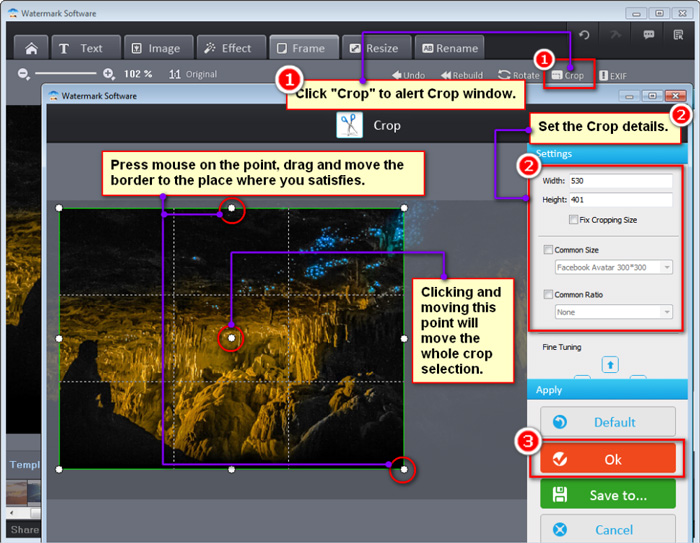
Three steps to go:
1. Use “Crop” ① and enter Crop window.
2. Select Crop section. Also you can define the exact number in width as well as height②.
3. Hit ”Ok” to save the change.
Know more tips and samples in photo crop, please check: Crop Photo in Batch Mode
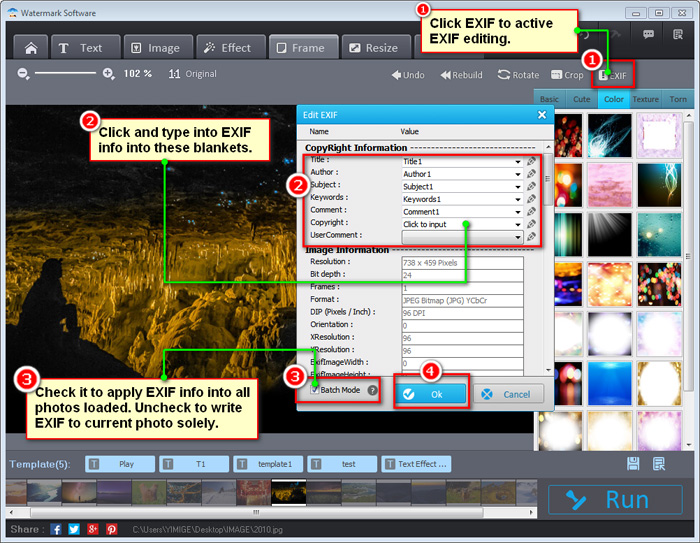
Quite a lot of advanced photographers would like to add EXIF info into their artistry. This photo watermark software allows adding copyright to photos:
1. Choosing “EXIF”① on the right top.
2. Click Title blanket and other blankets② to put EXIF information into each field accordingly.
3. Check “Batch Mode” to apply EXIF to all images.
4. “Ok” to save.
5. “Run” the software and choose JPG as output formats.
Know more tips and samples in EXIF, please check: Edit EXIF Info from Photo.
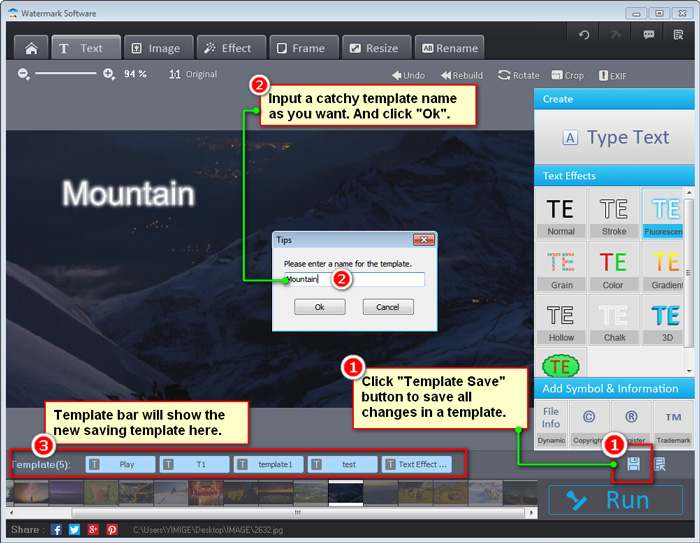
Template in this photo watermark tool can be used to save all the modifications. Which makes adding the same editing no hard next time.
Click “Save Template” ① button, input template name② and “Ok”. Image watermarks, EXIF info, Crop choice, text watermarks...whatever you changed will all be saved into the template. Close and launch watermark software again, push this template button, all modifications will be added back right away.
Know more tips and samples in EXIF, please check: Save A Custom Watermark Template For Next Using.
Resizing photos/avatars in a batch mode is a need sometimes. For this, we advise you to look at: https://www.watermark-software.com/resource/photo-resize.html
Adding logo to pictures is commonly used in commercial errands, so we prepare you:https://www.watermark-software.com/how-could-you-put-logo-on-pictures-at-once.html
Applying watermark to animated GIF is a hot potato, which most watermark tools can’t fix it, while we provide you the easiest way to make it:https://www.watermark-software.com/how-to-watermark-animated-gif.html
Protecting online photo copyright is very crucial these days, and we suggest you reading adding copyright to photos:https://www.watermark-software.com/protect-image-copyright.html
Rename photos in batch is very imperative, check rename water mark tutorial to know how:https://www.watermark-software.com/how-to-rename-photos-in-batch-for-better-organization.html
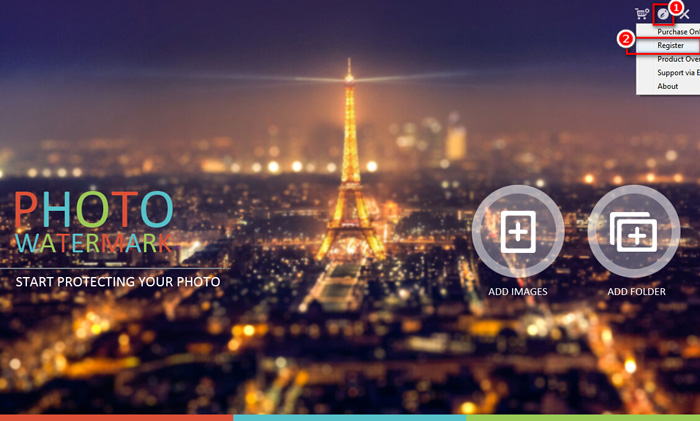
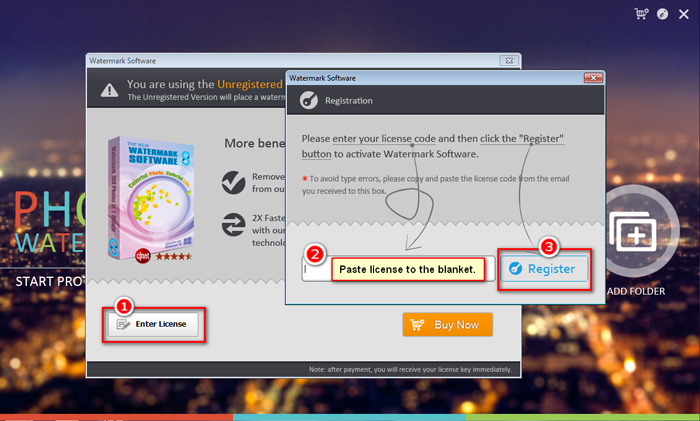
1.Register Question
Some users asked us on how to register this software. If you have the same question, please follow the below graphic guidelines to register it.
2.Business Use Question
Q: If I’d like to use it in business not in personal, what software pack should I purchase?
A: We have a business pack and unlimited pack, which all support business use. Business pack allows to register on 3PC. Unlimited pack supports to be used on unlimited PCs, but unlimited pack doesn’t allow re-sales. Here is the link to the two pack purchases.